smitool
Auto-Cut Feeds Wood for You—Safer, Smoother, Smarter. Only a Few Left! Order now!
Auto-Cut Feeds Wood for You—Safer, Smoother, Smarter. Only a Few Left! Order now!
Couldn't load pickup availability
Glad you found it!
If you've dealt with any of these, Auto-Cut is here to fix them all:


Auto-Cut changes the game.


Auto-Cut wasn’t built for factories. It was built for you—Standing at the saw every day,Pushing boards, watching every line, Breathing in the dust, because it was designed by a woodworker, too.
Think of it like a smart little assistant that handles the worst parts of the job:
- Automatic feeding – No more guiding with both hands. Auto-Cut pushes every cut straight and smooth, at a steady speed—for cleaner, faster cuts.
- Secure hold-down – Thin stock? Narrow cuts? Slippery surfaces? No problem. It grips tightly with zero kickback or drift.
- Multi-Tool Compatibility – Quickly switches between table saw, band saw, router table, and shaper—mounts with magnetic base on cast iron, or clamp on non-metal surfaces.
- Built-in Dust Port - Connects directly to your dust collector—protects your lungs, no extra mounts or modifications.
- Four-Level Pressure Lock-Set the pressure with a simple turn—the system auto-locks the right force, no height adjustment needed.
- Quick to Use-Beginner-friendly and ready to run—no angle setup, no height guesswork.
- This isn’t just about feeding wood- It’s about taking over the most dangerous, exhausting, repetitive, and unpredictable parts of every cut—So you can focus on the work that actually matters.
Auto-Cut(So Mini but Powerful Enough) feeds your wood with machine precision, Keeps your hands away from the blade—more freedom, more safety, less stress, speeds up your work, and handles even the smallest cuts you’d never dare try by hand.

Now, Almost 300 Auto-Cut units are now protecting woodworkers across the world. Here's why:
🛠️ What Woodworkers Are Saying
💬 “Terrific tool and a real asset in the workshop.”
– N Woodworker (used for over 2 weeks)
💬 “Extremely pleased. Easy setup, strong power. Just hook up the dust hose—works great!”
– Generoso Pg, Verified Buyer
More real review details in Judge.me
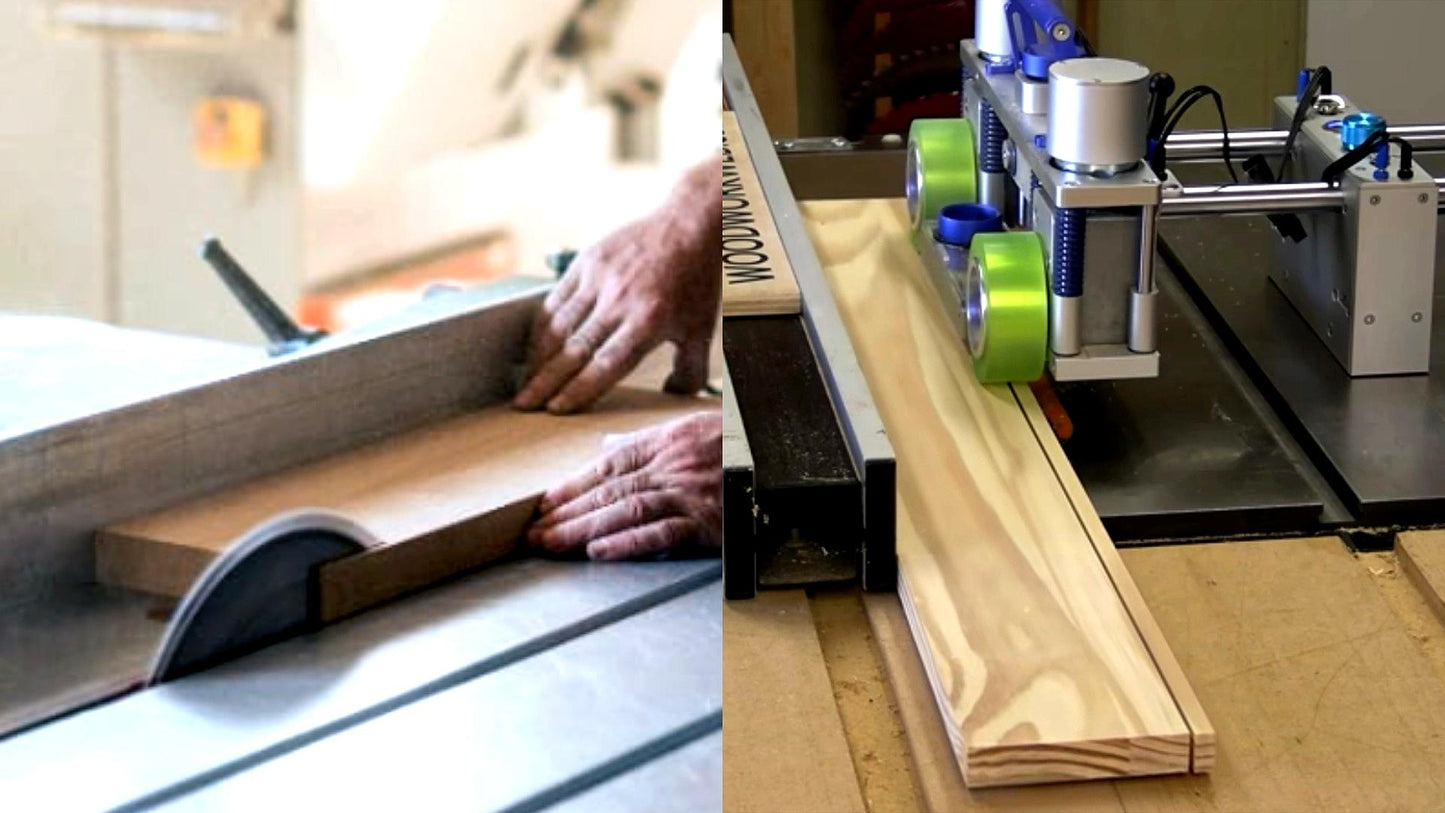
But, "Can I use a traditional feeder?" Good question.
What an experienced carpenter was Saying:
⭐️⭐️⭐️⭐️⭐️
“I’ve used traditional feeders for years—this one’s just as powerful but only 20 lbs.
I can remove it in seconds, and it has dust collection built-in. Finally, a real feeder designed for table saws.”
✅ Lightweight
✅ Easy to remove
✅ Dust collection included
✅ Perfect fit for table saws
— Verified customer in Judge. me (after months of use)
 Auto-Cut is so mini that you hardly see it on the table saw!
Traditional Feeders vs Auto-Cut
| Category | ❌ Traditional Feeders | ✅ Auto-Cut |
|---|---|---|
| ⚖️ Weight | 100–500 lbs, needs 2+ people or lift | Just 20 lbs — one-person portable |
| 🧰 Installation | Requires drilling, bolts, fixed mounting,Large area | Clamp-on in 5 minutes, no damage to table. top |
| ⚡ Power Supply | or 220V wiring, huge motor | 24V safe low-voltage, 110V adapter included |
| 🔌 Electrical Safety | High-voltage = high risk in home shop | Plug-and-Play power |
| 🧠 Operation Complexity | Roller tilt, head height, tension = needs skill | No calibration needed — Feed in and auto-cut |
| 📏 Cut Versatility | Not ideal for narrow stock | Feeds 1/8" strips |
| 🔄 Portability | Fixed to one machine, not easily moved | Switch between table saw, router table, bandsaw, shaper |
| 💸 Cost | $800–$1,500+, plus install cost/time/electrician | Affordable — built for small shops and pros |
| 🧹 Dust Management | ❌ No dust collection — often blocks existing airflow | ✅ Built-in dust port, integrates into your dust system |
| ♂️ Ideal User | Factory teams and big shop technicians |
Solo woodworkers, wookshop,part-time makers, and creative pros
|
Auto-Cut helps our customer cut large panels easily and with high quality!
Auto-Cut can quickly switch to shaper (and bandsaw, router table), with the same high quality and high speed to serve you
Already Trusted by Real Customers
Orders are coming in every day—from real woodworkers who need real results.
Common Replacement Parts & Accessories
Drive Wheel Set(Usually can meet high-intensity use for 2 years),$50/pair
 All accessories are optional and sold separately. To order parts, just contact us after your purchase—we’ll take care of the rest.
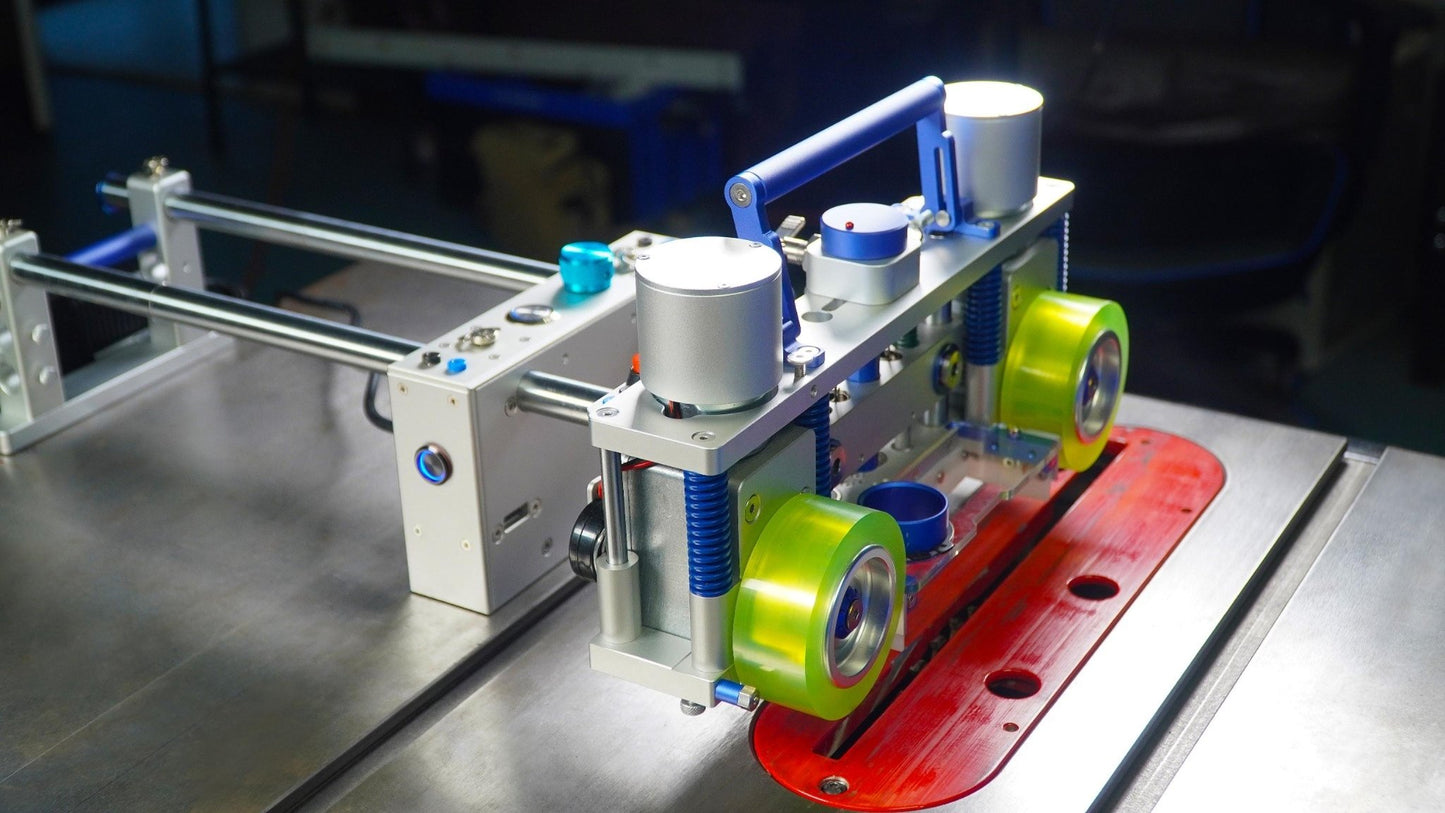
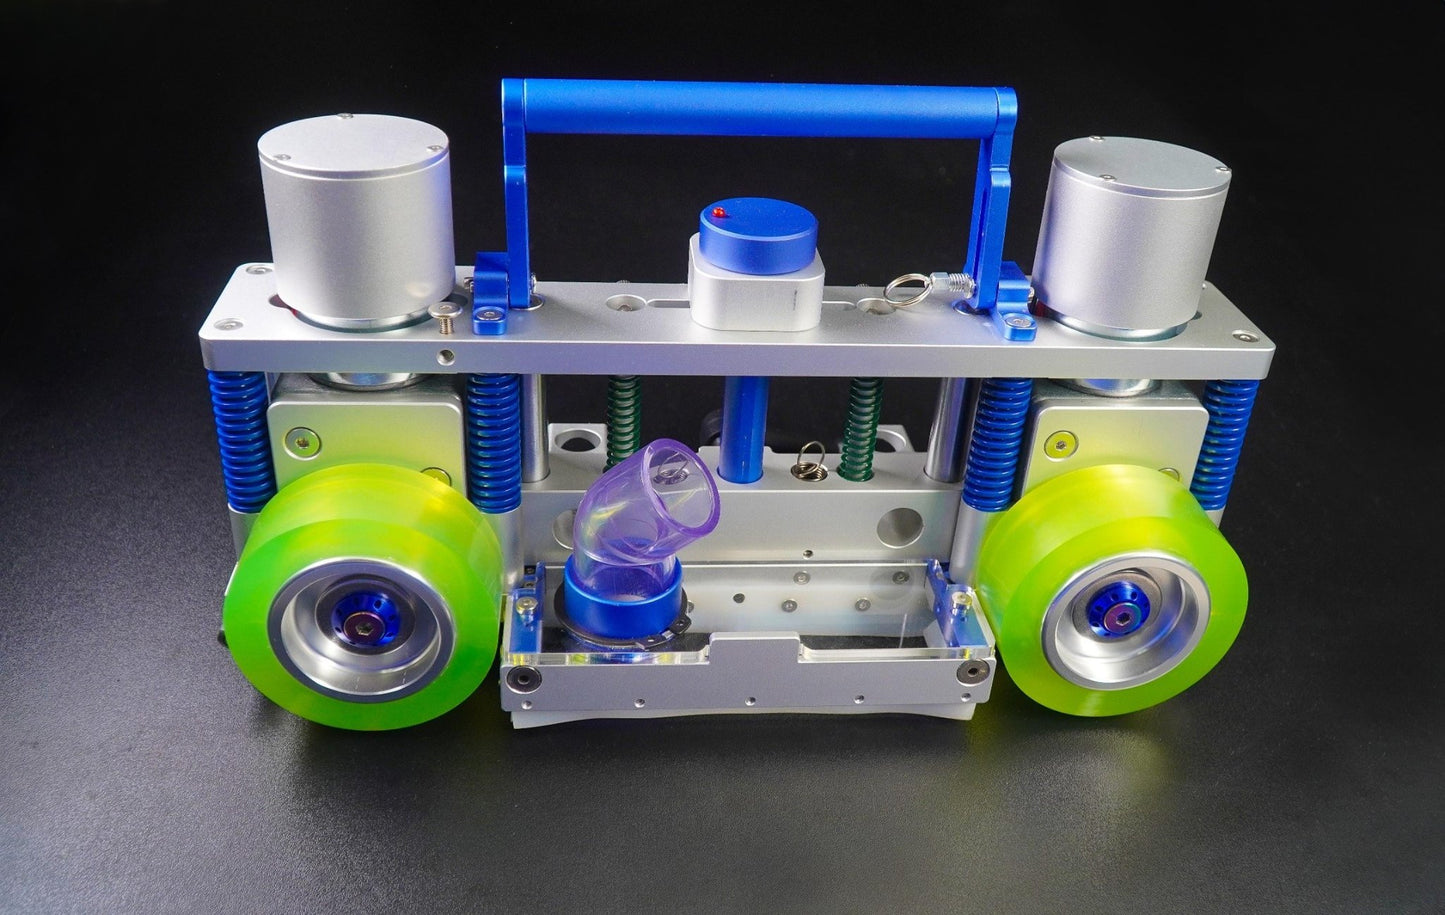
Highlights
Dual DC Motors

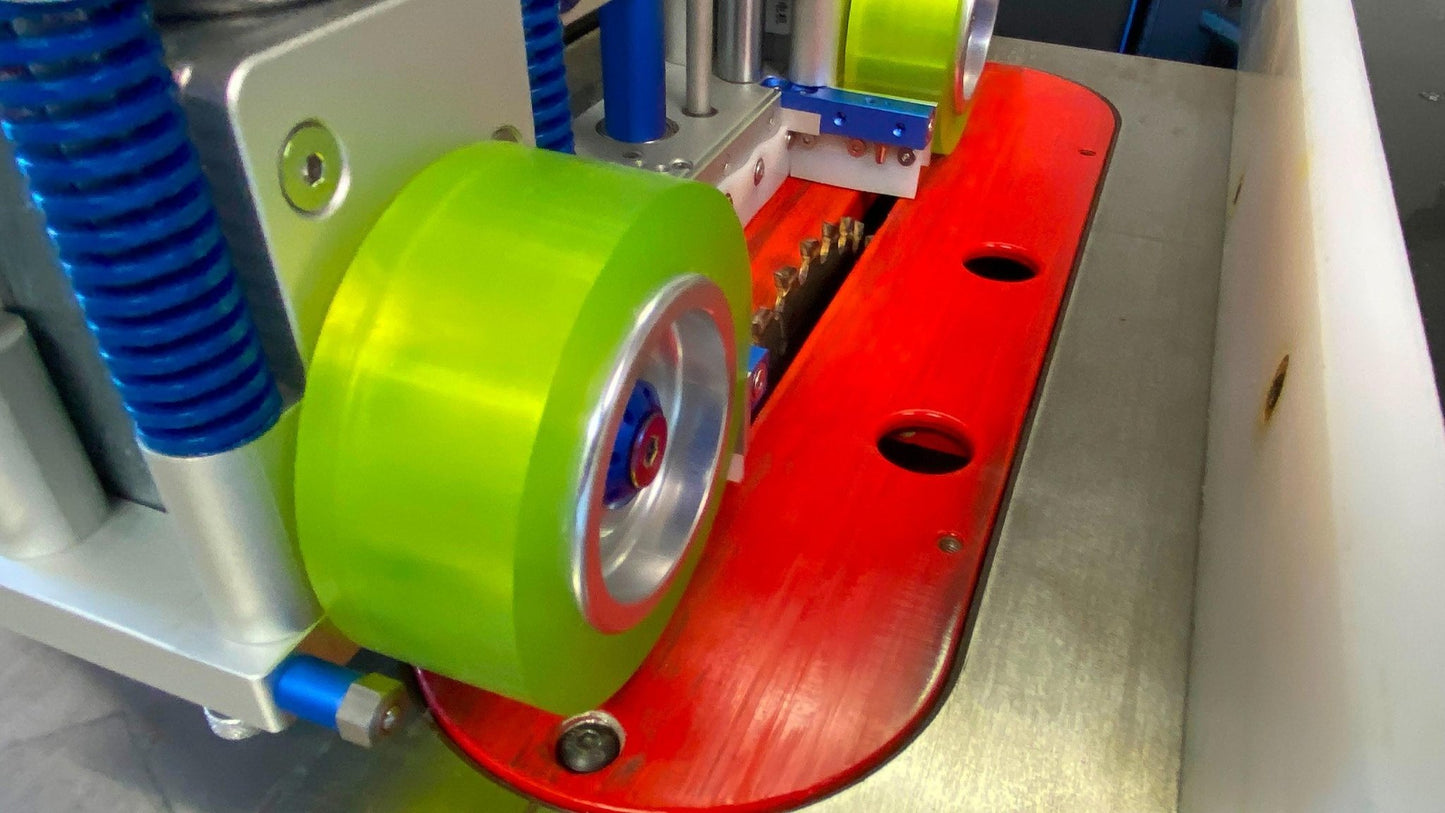
PU material wheels on both sides of the saw blade

Anti-Kickback
The Wheel-Around-Blade design effectively holds the wood board in place, featuring two safety blocks located at the front and rear of the saw blade.
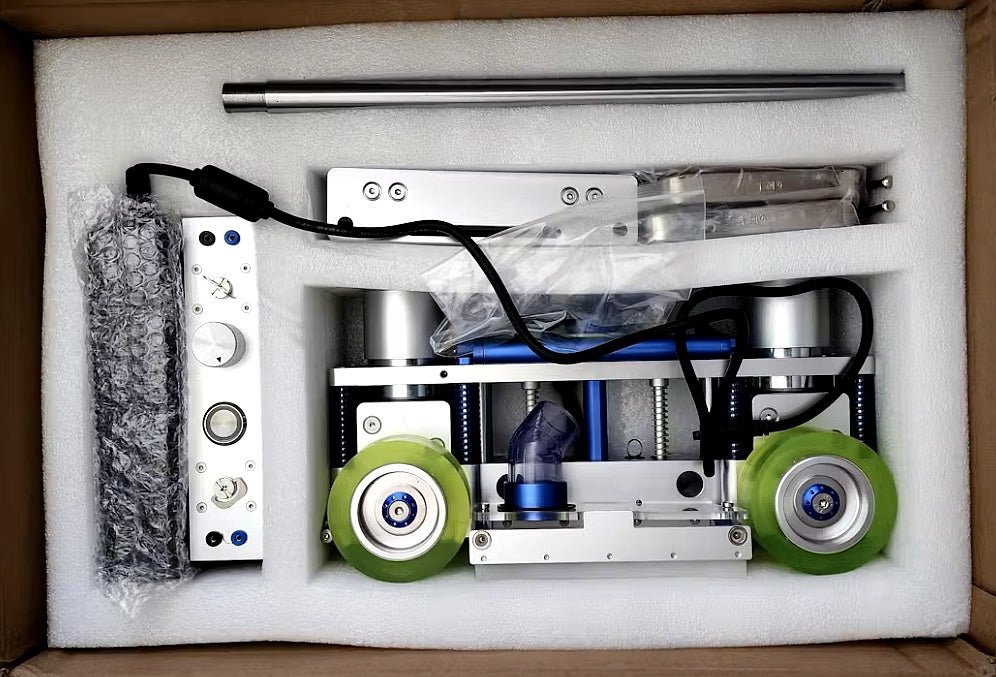
Quick Installation
The initial installation can be done in just 5 minutes!
1. A powerful electromagnet, Capable of holding up to 300 kg (650 Lbs).

2. Distinct rear support mounting design (resembling two hooks securely latching onto the table saw's edge),no need for drilling holes on the table saw top.
3. That' almost done

Simple Adjustment
Suitable for Almost Types of Materials.Whether the material is narrow, wide, thin, or thick, Easily handles.

Dust Port Included
A wood dust capture cage is positioned at the ideal spot between the two wheels.

Emergency Brake Function
Shutdown equals braking! After braking, the wheels maintain firm control the wood board, ensuring personal safety.

Supports Use on Non-Iron Tabletop Equipment
The control box features two rectangular through holes.

Quick and stable attachment on router tables and Non-Iron Tabletop Equipment
using clamps.

Adjustable Driving Force
Four drive force settings, just turn the knob to select the one you need.It automatically locks the drive wheel's descent distance. No need to adjust it manually like typical feeders.

Variable Driving Direction
Includes two anti-out elastic plugs.

Operates at a safe 24V DC voltage.Easily change the rotation direction by swapping the plugs.
Infinite Drive Speed Control(0--27 Feet/Min)

Thank you very much Mr Colin Kinecht for the following wonderful explanation:
You may notice that the old video above mentions that it was crowdfunded, and you may be curious: was it successful?

Auto-Cut was successfully funded on Kickstarter in January 2024. We're truly grateful to the 191 backers for their trust and support — today, Auto-Cut is creating value for them every day. Just like this customer below.

(This user comment is taken from a public social media platform,Thank you very much to this user. )
And More
1. How much driving force can it generate?
2. Emergency braking and restart /anti-kickback demonstration.
3. How well does it perform in a vertical setup?
If 30 minutes saved each day adds up to 200 hours a year — Auto-Cut pays for itself faster than you think.
Advantages of Smitool Auto-Cut:
1. Reduces the risk of cutting accidents, especially during long-distance rip cutting (The longer the drive, the higher the odds!)
2. Virtually eliminates kick-back incidents.
3. Effortless, stress-free, and dust-free cutting.
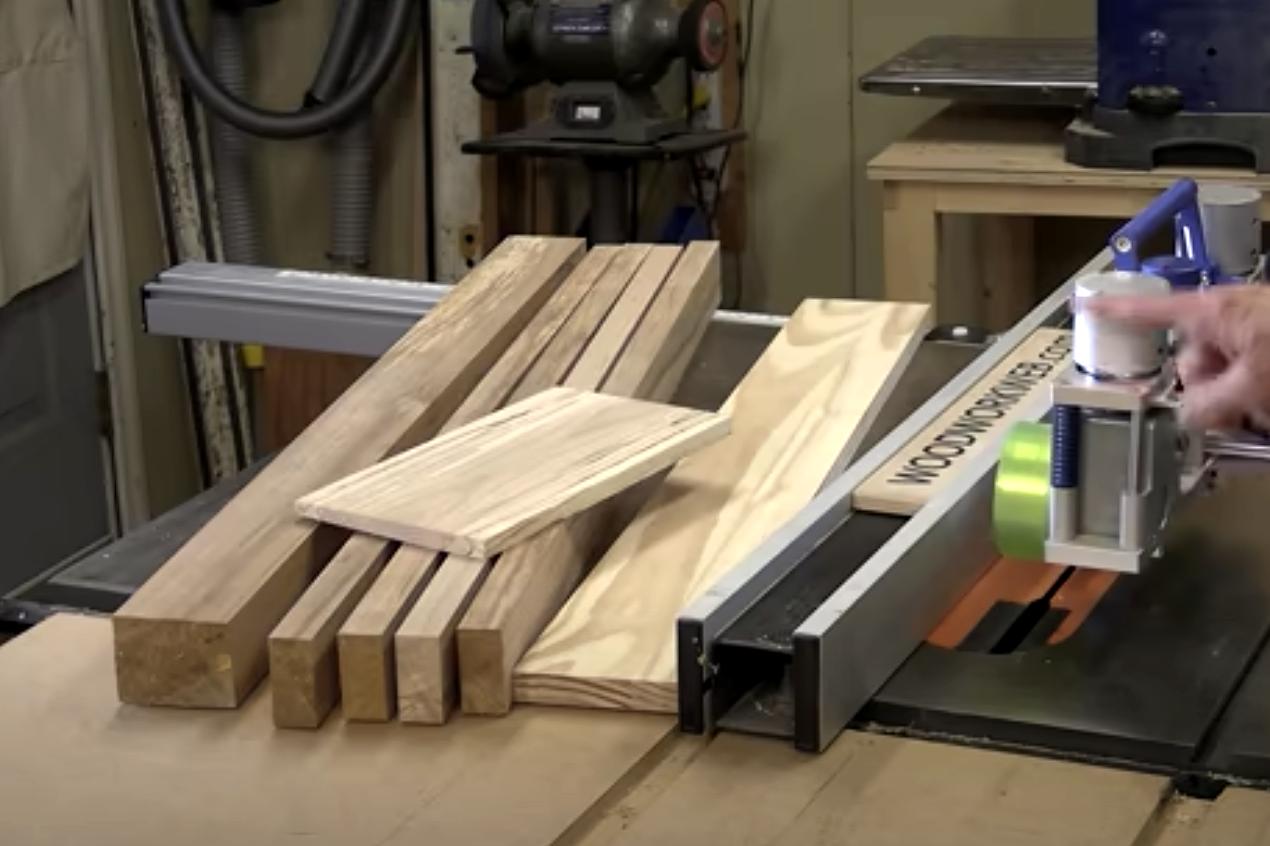
4. Faster cutting speeds, up to 3-4 times faster for multiple pieces of the long wood board.
5. Provides ultra-clean, perfect cutting quality without blacking.
6. Ideal for small workpieces or tasks with limited manual control space, which would be impossible manually. For example Video :
6.1 Tiny and thin cuts, down to 1/8 inch thick boards, cutting 1/8x1/8 inch or 3mm*3mm inlays.This feature is extremely useful for batch production of inlay strips.
6.2 Cutting extremely short pieces of wood, as short as 14 inches. This feature is particularly useful for making cutting boards.
6.3 Special-shaped material cutting.
6.4 Support for square reprocessing, which includes creating polygons with angled saw blades, such as octagons and 8-to-16-sided polygons, and efficiently making slots in squares.
7. Precise width size control cutting: If your saw's fence can be adjusted in increments of 0.1 millimetres, precise cuts can be done.
8. Compatible with portable table saws equipped with aluminum tabletops and can be used similarly on router tables.
9. Suitable for bandsaws; remains consistent when used on iron tabletops, and for aluminum tabletops, it mirrors the setup used on router table
Is Auto-Cut Right for Your Setup?
To make sure Auto-Cut performs its best, here are a few things to keep in mind:
🔄 Auto-Cut is designed for rip cuts. For cross-cuts, we recommend using traditional sleds.
🪵 For optimal feeding, a flat board surface is ideal. Warped or uneven stock may affect performance.
👷 While setup is fast, proficiency improves results. Like any tool, it gets better as you get used to it.
Install Auto-Cut in 5 minutes and get factory-grade results anywhere.
Auto-Cut: The Last Time You Push Wood by Hand—Ever.
Get yours now, before it’s gone. See more details in the section below(Q&A etc).